A few months back, I stared at my basic aluminum EDC slider and thought, “This works, but it feels… generic.” I didn’t want to drop $60 on a custom one, so I decided to DIY it. Fast forward to now: that once-bland slider has a hand-engraved design, a smoother slide, and even a pop of color—and it cost me less than $10 in supplies. If you’re tired of your slider looking like everyone else’s, DIY is the way to go. Today, I’m sharing my favorite EDC slider modification tricks, from easy upgrades to creative personalization—no fancy tools or expert skills required. Let’s turn your “meh” slider into something uniquely yours.
Why DIY Your EDC Slider?
DIY isn’t just about saving money (though that’s a big plus). It’s about making your slider feel like an extension of you. When you engrave your initials, swap out the finish, or tweak the sliding mechanism, you’re not just modifying a tool—you’re creating a carry piece that tells a story. Plus, it’s weirdly satisfying to pull out a slider and think, “I made this.” I’ve gotten more compliments on my DIY slider than any expensive one I’ve owned—and it’s all because of the personal touch.
Easy DIY Mods for Beginners (10 Minutes or Less)
If you’re new to DIY, start with these simple upgrades—they’re foolproof and make a big difference:
1. Smooth Out the Slide (No More Sticking!)
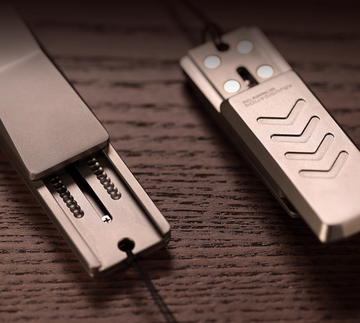
The #1 complaint about budget sliders is sticky movement. Fixing it takes 2 minutes and a tube of lubricant. I use PTFE spray (like WD-40 Specialist Dry Lube)—it’s dry, so it won’t attract dust. Just spray a tiny amount on the rails, slide the piece back and forth a few times to distribute it, and wipe off excess with a microfiber cloth. My Amazon Basics slider went from “meh” to “buttery smooth” with this trick.
2. Add Color with Nail Polish or Paint
Want to make your slider pop? Grab some nail polish (matte finishes work best!) or acrylic paint. I painted the edges of my aluminum slider neon pink— it’s subtle but adds a fun pop of color. Pro tip: Tape off the parts you don’t want to paint (like the sliding surface) with painter’s tape. Let it dry for 24 hours, and you’re done. It chips a little over time, but that just adds to the “lived-in” vibe.
3. Engrave Initials with a Dremel or Stamping Kit
Personalization doesn’t get simpler than adding your initials. If you have a Dremel tool, use a engraving bit to trace your letters (go slow—light pressure is key!). If not, a metal stamping kit (under $20 on Amazon) works too. Just place the slider on a hard surface, line up the stamp, and tap it gently with a hammer. I stamped my first initial on my titanium slider—it’s small, but it makes it feel mine.
Advanced DIY: Step-Up Your Slider Game
Once you’ve mastered the basics, try these mods for a more custom look:
1. Swap Out the Sliding Piece (Upgrade the Feel)
Most sliders have a removable sliding component (the part you push). You can swap it out for a different material—like a brass weight for extra heft or a wooden dowel for a unique texture. I swapped my stainless steel slider’s piece for a small brass cube I found at a craft store. It took 5 minutes with a drill (to make the hole match the rail) and now it has a satisfying, heavier feel.
2. Add a Keychain Loop (No More Losing It!)
If your slider doesn’t have a keychain loop, add one! Buy a small metal keyring loop (from a hardware store) and attach it with epoxy glue (I use E6000—it’s strong enough for metal). Clean the area with rubbing alcohol first, apply a tiny amount of glue, press the loop into place, and let it dry for 48 hours. Now my DIY slider stays attached to my keys—no more panic when I can’t find it.
Must-Have Tools for EDC Slider DIY
You don’t need a workshop—just these basics:
-
Microfiber cloths: For cleaning and wiping excess lubricant/paint.
-
PTFE lubricant: For smoothing slides.
-
Painter’s tape and nail polish/acrylic paint: For color mods.
-
Metal stamping kit or Dremel: For engraving.
-
Epoxy glue: For attaching loops or swapping parts.
-
Drill (optional): For advanced mods like swapping sliding pieces.
3 Mistakes to Avoid (I Learned These the Hard Way)
-
Over-lubricating: Too much lube attracts dust, making your slider sticky again. Less is more!
-
Using the Wrong Paint: Regular spray paint peels off metal—stick to nail polish or metal-specific acrylic paint.
-
Rushing Engraving: I once tried to engrave too fast and messed up my initials. Take your time— it’s better to go slow than start over.
Final Thought: DIY = Your Perfect Slider
The best part about DIY EDC sliders is that there’s no “right” way to do it. You can go simple (a little paint, some lubricant) or go all out (swapped parts, custom engravings). Either way, you’ll end up with a slider that’s unlike anyone else’s—something that feels personal, not just purchased.
Have you DIY’d your EDC slider? Or do you have a mod you want to try? Drop a comment below—I’d love to see your creations!
